Great Graphite Workshop
Three days of intense graphite drawing. Exercises for hand-eye co-ordination, observation, continuous tonal shading and underpainting for graphite. Exhaustive and exhausting but hopefully, very rewarding.
This is a step-by-step demo of an almond using the underpainting techniques that I did this afternoon slightly hampered by a streaming cold.

Stage 1 Outline in graphite and then a thin layer of colour using a touch of Faber Castell Sanguine, Burnt Ochre, Bistre and Prismacolor Ginger Root plus a few Irojiten neutrals. (We are now selling these individually at £1.50 each. They are very difficult to get hold of as singles. The full sets are still a good price on Amazon)
Taking care to leave a millimetre or two around the edge so that when applying the solvent there is no danger of spreading the colour over the edge of the drawing.

Stage 2 Blend the dry colour into the paper using a clear alcohol based solvent such as the Promarker blender pen, (see our online shop), taking the colour carefully up to the edges.

Stage 3 After a few minutes the paper is dry and ready for the graphite drawing to begin using a selection of clutch pencils with F, HB, B and 2B leads. The graphite is used to describe the textures, marking and tonal shading over the top of the coloured underpainting.
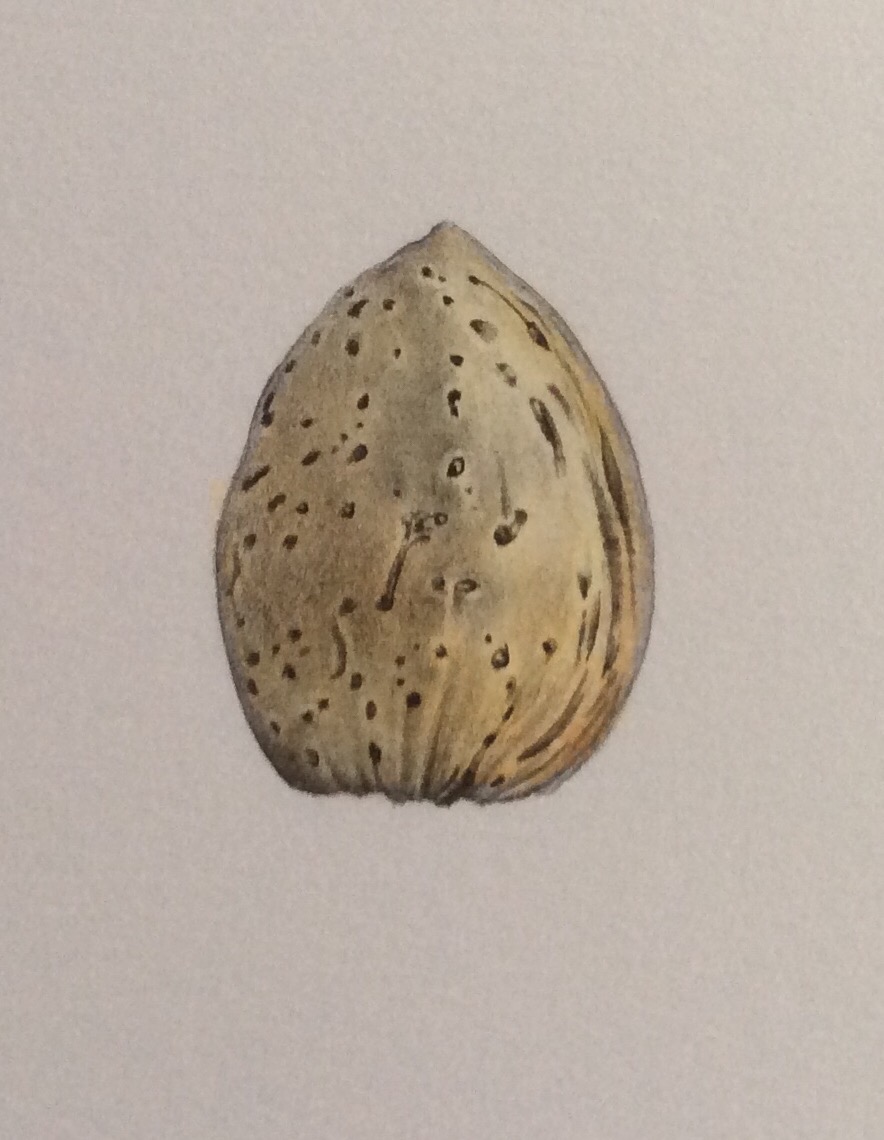
Stage 4 The finished nut – the colour could have been a bit stronger at the beginning but otherwise, job done!
STOP PRESS
* Details of a new workshop in South Africa at Kirstenbosch in November have just been posted on my website. If you are interested please let me know as we only have 9 spaces and these will go quickly I expect. We will be giving people the opportunity to add on a few days at a Safari Lodge along the Garden Route. More details as soon as available.
* My new website should be coming online soon and we will be posting regular step-by-step demos and ‘tips and tricks’ plus a monthly newsletter so if you are interested do lease sign up.
Me and Ollie in the greenhouse